How to Install C++ with MinGW on Windows
Jul, 2024 Sun

Installing a C++ compiler on Windows can be an intimidating task for beginners. However, MinGW (Minimalist GNU for Windows) provides a straightforward way to set up a C++ development environment. This guide will walk you through the steps to install MinGW and configure your system to compile C++ programs.
Step 1: Download MinGW
- Go to the MinGW download page: Open your browser and navigate to the MinGW download page on SourceForge.
- Download the MinGW Installer: Click on the "Download" button to download the MinGW Installation Manager (mingw-get-setup.exe).
Step 2: Install MinGW
- Run the Installer: Locate the
mingw-get-setup.exefile you downloaded and double-click it to run the installer. - Install MinGW:
- Click Install.
- Choose the installation directory (default is C:\MinGW) and click Continue.
- The installer will download the necessary files.
Step 3: Select and Install Packages
- Open the MinGW Installation Manager: Once the installation is complete, the MinGW Installation Manager will open. If it doesn’t, you can find it in your Start menu.
- Select Packages:
- In the Installation Manager, expand the Basic Setup option.
- Right-click on the
mingw32-gcc-g++package and select Mark for Installation. This is the GNU C++ Compiler. - Optionally, you can also select other packages you might need, such as
mingw32-gcc-objcfor Objective-C ormingw32-gdbfor the GNU Debugger.
- Apply Changes:
- Click on the Installation menu and select Apply Changes.
- Click Apply on the pop-up window to start the installation of selected packages.
Step 4: Configure Environment Variables
- Open Environment Variables:
- Press
Win + Xand select System. - Click on Advanced system settings.
- Click the Environment Variables button.
- Press
- Add MinGW to PATH:
- In the System Variables section, scroll down and select the Path variable, then click Edit.
- Click New and add the path to your MinGW
bindirectory (e.g.,C:\MinGW\bin). - Click OK to close all dialog boxes.
Step 5: Verify Installation
- Open Command Prompt: Press
Win + R, typecmd, and press Enter. - Check GCC Version: Type
g++ --versionand press Enter. If the installation was successful, you should see the version of the installed GCC (GNU Compiler Collection).
Step 6: Write and Compile a Simple C++ Program
- Open a Text Editor: Open any text editor like Notepad or Visual Studio Code.
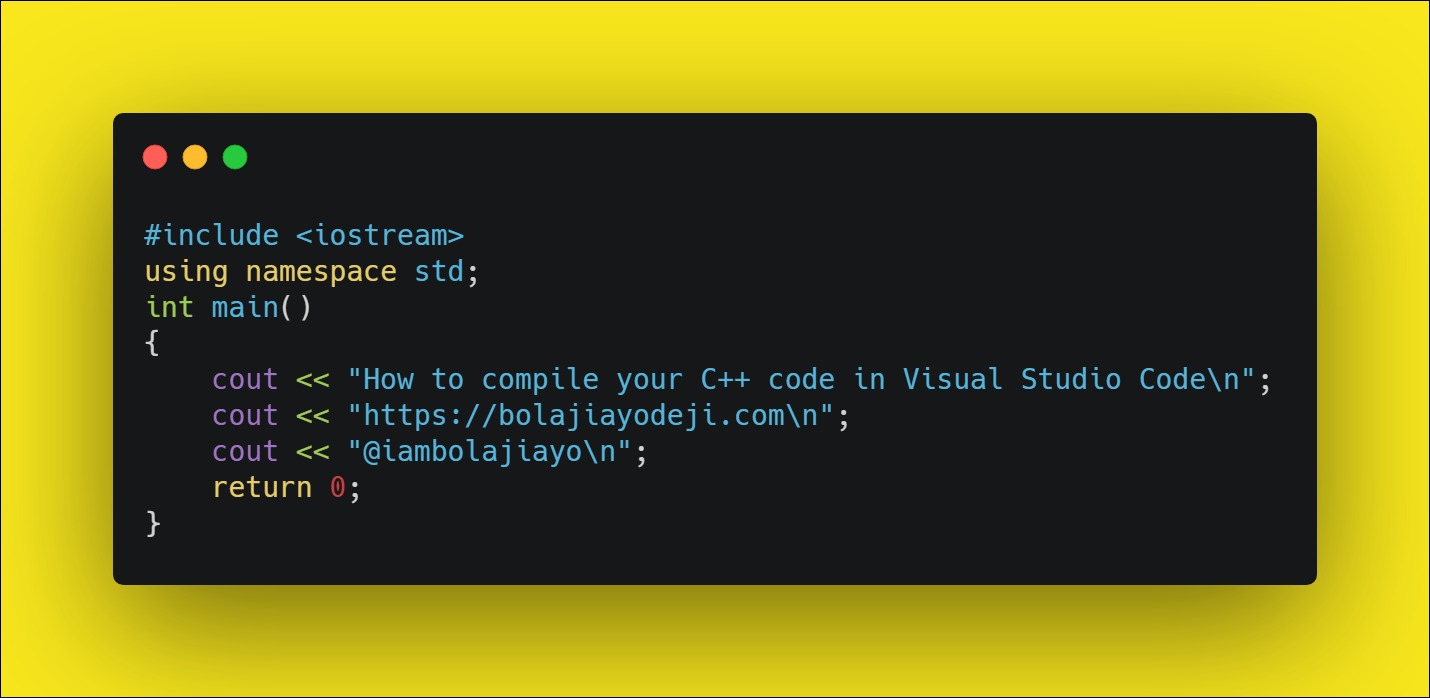
- Write a Simple Program:
#include <iostream> using namespace std; int main() { cout << "Hello, World!" << endl; return 0; } - Save the File: Save the file with a
.cppextension, for example,hello.cpp. - Compile the Program:
- Open Command Prompt and navigate to the directory where you saved
hello.cpp. - Type
g++ -o hello hello.cppand press Enter. - This command compiles the
hello.cppfile and creates an executable namedhello.exe.
- Open Command Prompt and navigate to the directory where you saved
- Run the Program: Type
helloand press Enter. You should see the outputHello, World!.
Congratulations! You have successfully installed MinGW and compiled your first C++ program on Windows. This setup will allow you to write, compile, and run C++ programs efficiently.

Trending